

 The "Adventure KidsTM" aka Debra C. Argen and Edward F. Nesta had the ultimate creative adventure blowing glass at The Hotspot Glass Studio in Fairfield, Connecticut. We have always been fascinated by glass art, whether admiring large-scale works by glass artist Dale Chihuly or watching Swedish glass-blowers hand-blowing our wine glasses. The excitement in transforming liquid sand (aka molten glass) into a beautiful glass art creation has always been high on our "to do" list. What we learned from our class at The Hot Spot Studio is that the art of making glass is a dual process of transformation, for the art created, and for the artist who created it, and we loved what we created!
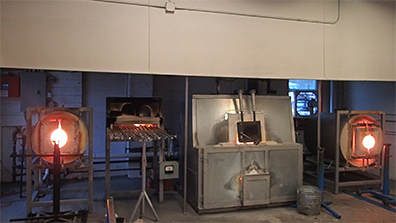
Equipment – Glory Hole, Pipe Furnace, Pot Furnace
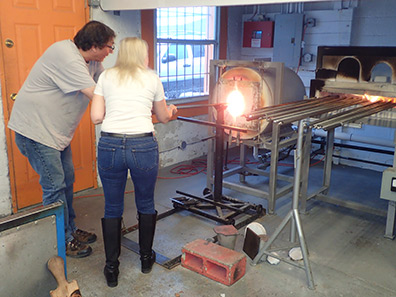
On Sunday, December 1, 2019, we entered the doors of The Hotspot Glass Studio as snow was swirling outside creating a perfect yin yang environment of cold and warmth. Glass artist Rob Wolf was our instructor for the glass experience, and he introduced us to the other glass artists then provided us with a tour of the studio and an introduction to the main equipment and the tools of the trade so to speak. First and foremost was the pot furnace (2100 degrees F), this is where they keep molten glass. Then there were two glory hole furnaces (2200-2300 degrees F), which are smaller, open, intense red-orange furnaces, used to reheat glass during the creative process. In line with the pot furnace and glory hole furnaces is the pipe furnace where blowpipes and punty (solid metal rods of various thickness) are kept heated, and off to the side is the annealer (900 degrees F) where a finished object is placed to cool down slowly.
VIDEO – Instructor Rob Wolf Introduces Luxury Experience to the Art of Glass Making and the equipment – https://youtu.be/qwRL2SJHz-8
There are 2 types of metal pipes used, the blowpipe has an open end to use for blowing glass, the other type of metal pipe, called a punty, has a closed end used for making shaped glass objects (i.e. paperweight, flower, etc.). Within the 2 types of pipes there are varying thicknesses depending on the amount of molten glass you will use for your project (i.e. whiskey glass or large vase).
Ideas for glass making
Our tour of the studio completed we were ready to begin. Our first task was to select what we wanted to make: we could choose to make shaped objects (no glass blowing involved) like paperweights or flowers, or we could make blown-glass objects like pumpkins, Christmas ornaments, tumblers, pint glasses, or stemless wine glasses.
We decided to experience both methods of glass art: (Debra) would make a paperweight to experience shaping glass, and (Edward) would make a whiskey glass to experience blowing glass. Now that we knew what we were making, we needed to select our colors as we would begin with clear molten glass and then add small pieces of colored glass called "frit" to create patterns and designs.
Pulling Molten Glass
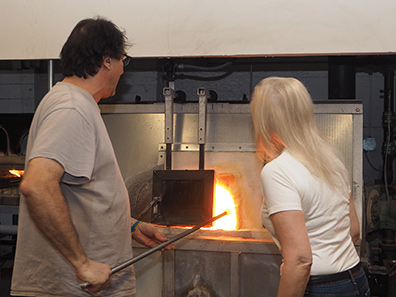
Debra: I went first, and with my heart racing in anticipation and excitement, I stood in front of the furnace and its intense heat and inserted the metal pipe into the furnace to gather molten glass at the end of it. The phrase, "if you can’t stand the heat…" popped into mind. Rob had told us in advance that the studio gets very warm and wearing T-shirts provided a much more comfortable experience.
Cooling the pipe next to the marver
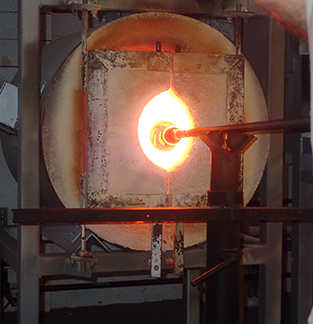
From the furnace to the glory hole…the next step was inserting the tip of the metal pipe into the glory hole while keeping it level and slowly turning the pipe to start shaping the glass. If you fail to turn the pipe or tilt the pipe the molten glass will start sliding and could fall off. Twirling the molten glass on the pipe was like twirling honey on a stick, you must keep twirling it to keep it steady. The goal was to keep the pipe level, and slowly turn the pipe to createa nice even shape that would expand as the pipe was turned.
Turning in the glory hole
The next step was adding bits of colored glass (frit) to the molten glass. I love the sea and for my paperweight I selected the colors cobalt blue, green, and celadon. Colors selected it was back to the glory hole to heat the frit onto the molten glass. Next came the shaping of the molten glass. This was a 2-person job; while Rob turned the pipe, I grabbed the end of the molten glass with large tweezers and gently pulled and twisted the molten glass. When the glass started to cool a bit, it was back to the glory hole to reheat it, then back to the bench for more turning and twisting. Slowly the molten glass lengthened like taffy, and I kept twisting it, and then folding it back onto itself with trips to the glory hole as needed. The goal was to create airpockets in the design, which would give my paperweight bubbles and make it interesting.
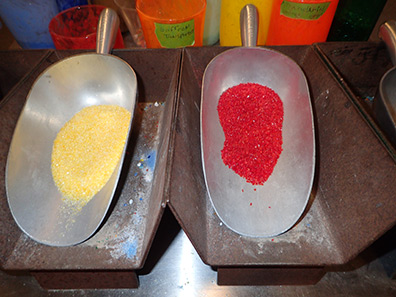
Frit
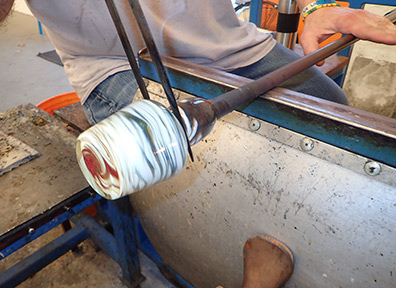
Debra forming the paperweight
The interior design created, it was time to go back to the furnace to gather more glass to cover it, followed by a stint in the glory hole. The next step was shaping the ball I had created into a smooth paperweight shape accomplished using water-soaked wood blocks, which looked like large wood ladles. I also used water-soaked newspaper in the shaping process. It was starting to look great. Now I had to hold the pipe upright so that the ball could fall back onto itself to create the paperweight’s dome.
Forming paperweight with wooden ladle
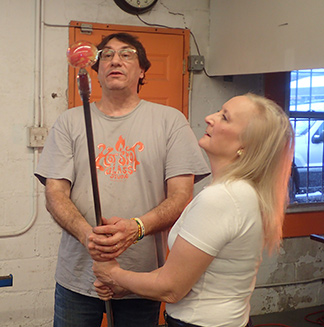
Turning the paperweight on pipe
The next step was removing the paperweight from the pipe accomplished with assistance from Rob and Joe, another glass artist. The paperweight now had a punt mark from where it was removed from the pipe. Rob instructed me how to use a blowtorch on the punt mark and then press over the punt mark area with a small tool to smooth it out a bit so it would not be rough. The final step was placement in the annealer where it would cool down for a few days. As it was still "redhot" when it went into the annealer, I could not wait to come back and see what my finished paperweight looked like once the colors had cooled.
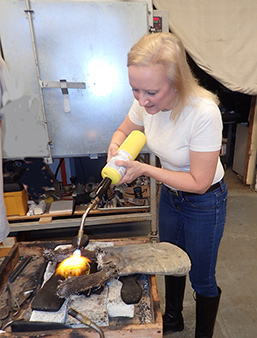
Torching the punt mark
Edward: I had the luxury of watching Debra’s creation so I was familiar with a few of the steps that I would go through to create my whiskey glass. The first step was to select a color or colors that would be used to create a swirl pattern for the glass. I selected cobalt blue and white and we set the colors aside as we moved to the pot furnace to pull out some molten glass.
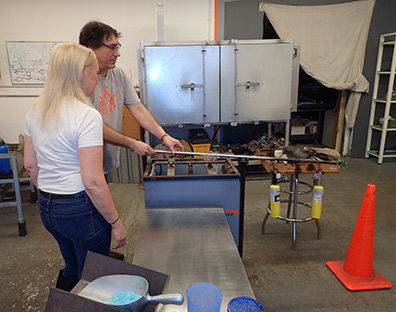
Setting up molten glass to be shapped for Whiskey Glass
With the molten glass attached to the blowpipe we moved to the glory hole to start the shaping process which entailed slowly rotating the pipe as the molten glass would droop and then with a slight swirl it would start to take the shape of cylinder. The cylinder of glass, called a parison, was removed and smoothed out on the "marver" (a flat metal or marble surface) then went back in the glory hole. To ensure the glass was taking shape, Rob sat at the bench between two parallel rails and rolled the pipe across the rails allowing the glass to roll through a wet cloth he was holding to smooth the glass. The next step was to roll the glass slowly in the frit of cobalt blue, and then it was returned to the glory hole to allow for the clear glass to meld with the cobalt glass.
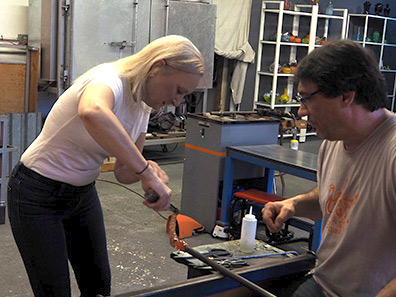
Edward using the blowpipe
The cylinder of glass (parison) was then rolled on the marver followed by rolling it into the white colored glass and it was returned to the glory hole so the colors could meld together.
VIDEO – Edward F. Nesta blowing glass – https://youtu.be/g7DxTqqtyEg
Shaping the glass
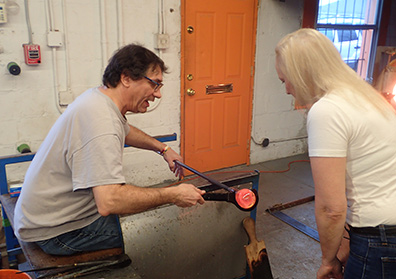
Now the fun part came as instructor Rob sat at the bench and rolled the blowpipe across the two parallel rails and called for me to sit on one side and blow into the tube end as he rolled the pipe while Debra was on the opposite side ready to "paddle the bottom" of the glass as it expanded and took shape from my blowing into the tube. With Rob calling out "more air," or "slow down" the whiskey glass started to take shape along with Debra holding a wooden paddle against one end of the rounded balloon-like glass to create a flat bottom.
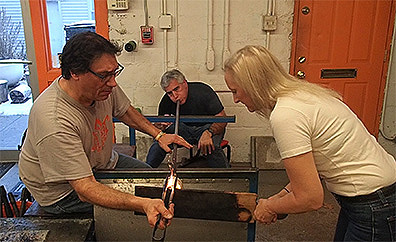
Teamwork creating the whiskey glass
VIDEO -Teamwork – Blowing glass, rolling the blowpipe and forming the bottom of the glass – https://youtu.be/cVExp0p1vOY
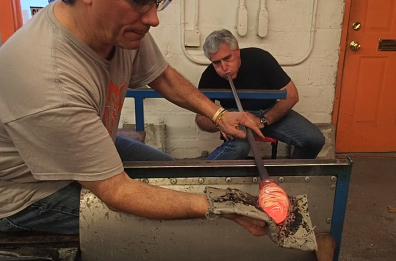
A few more times into the glory hold and back out to the bench for additional shaping by blowing into the blowpipe while Debra addressed the bottom of the glass. The next crucial step was to transfer the glass to another pipe attached to the bottom and then to cut the glass from the blowpipe. Where the blowpipe was connected would now become the rim of the glass.
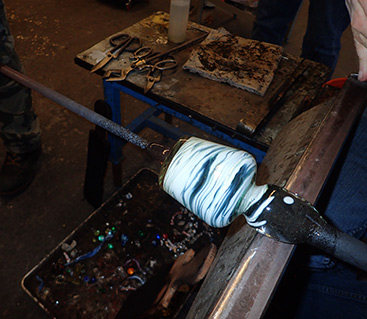
Transferring from blowpipe to punty
VIDEO – Forming the rim on a piece of blown glass – https://youtu.be/v9XMuX_0xqs
Back to the glory hole for more shaping and then to the bench so Rob could roll it back and forth on the rails as another instructor assisted in cutting the edges to form the rim of the glass. Another trip to the glory hole to ensure a smooth and even formation and then the last step, after separating the work from the pipe, was to smooth out the small punt mark on the bottom of the glass with a blowtorch and small wood tool. The whiskey glass was now ready for the annealer and eventually to be used as a fabulous vessel to partake of my favorite spirits.
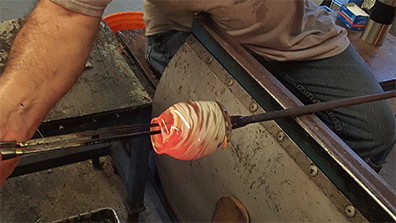
Forming the rim
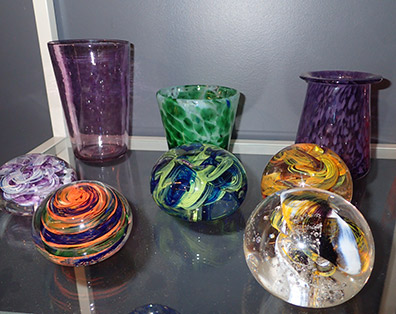
(Edward) returned to the studio a few days later to pick up our art glass, and now everytime that we look at the paperweight or the whiskey glass that we made at The Hotspot Glass Studio we feel joy and take pride in our creations. The paperweight is stunning with its swirls of blue and green with tiny and larger bubbles, and the whiskey glass is a collector’s dream with its swirling blue and white design. One of the best parts of blowing or shaping glass is that imperfection is perfection, as imperfections designate that the piece is an original work of art and was not mass produced. We had an amazing experience at The Hotspot Glass Studio and cannot wait to go back and let our imaginations create more beautiful pieces.
Finished products – whiskey glass and paperweight
The Hotspot Glass Studio experience is perfect for your inner artist to create something unique for yourself or to create a special gift for a loved one. The Glass Experience is also a great idea to celebrate special events or as corporate team building. Glass Experiences can be purchased for 1 hour, or a more extensive experience for 4 hours. In addition to the classes, you can also purchase wonderful gifts made by the glass artists in their small giftshop, or commission pieces from the glass artists.
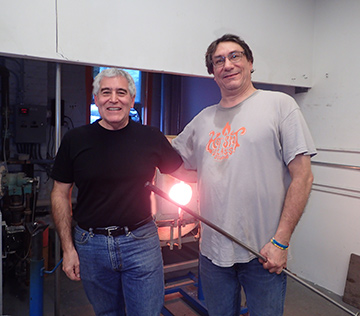
Edward F. Nesta and Rob Wolf
For information on taking classes at The Hotspot Glass Studio please call them at +1-203-565-7214 or visit their Facebook page at www.facebook.com/hotspotglass
Until next time, keep enjoying life’s adventures!
Important Things to Know Before You Go
|
o |
Bring your imagination. Have an idea of what you would like to make in advance: ornament, whiskey glass, paperweight, etc. |
|
o |
Wear cotton clothes. Do not wear clothing made of polyester that could melt on you in the case of an accident. |
|
o |
Wear cotton clothes. Do not wear clothing made of polyester that could melt on you in the case of an accident. |
|
o |
Short Sleeve T-shirts work well as the studio is very warm. |
![]()
The Hotspot Glass Studio
112 Post Road (same parking lot as Fairfield Social)
Fairfield, CT 06824
United States
Telephone: +1 203-565-7214
Facebook: www.facebook.com/hotspotglass
Follow The Hot Spot Glass Studio on Facebook at www.facebook.com/hotspotglass
Follow Luxury Experience on Facebook at www.facebook.com/LuxuryExperience to see more photos and watch video clips.
Follow Luxury Experience on Twitter at https://www.twitter.com/luxurypair @luxurypair
Follow Luxury Experience on Instagram at https://www.instagram.com/luxurypair @luxurypair
© December 2019. Luxury Experience. www.LuxuryExperience.com All rights reserved.